Simple Ways to Your Own Home Media Server
How about sitting on a cosy couch and browsing through all your precious memories on a smartphone or tablet? Doesn’t this sound wonderful to you? How can we achieve this? It’s easier than you think!
What do we need?
- A local storage that contains all your photos and videos. I’m not talking about copying all of them on your Android device or uploading them to a cloud service. These storages might be too small, too slow, inaccessable, or untrustworthy. So what do we need? A hard disk would be perfect, for example in a computer, externally or as network-attached storage.
- A local network is required to access all your media files stored on a local storage. Do you have a wireless router? Perfect! Many models allow you to connect hard disks via USB or network cable.
- The right app for your Android device that allows you to access your local storage in your local network. PhotoMap is the perfect choice. It can access your photos and videos via widely used network protocols, e.g. FTP, FTP Secure, or Samba (SMB/CIFS).
I’ll show you an example:
What do we have?
- An external hard disk that is connected to a router via network cable (see the pictures below). This type of storage is called Network-Attached-Storage (NAS).
- A wireless router that usually connects your Android device to the Internet.
- An Android device with PhotoMap installed.
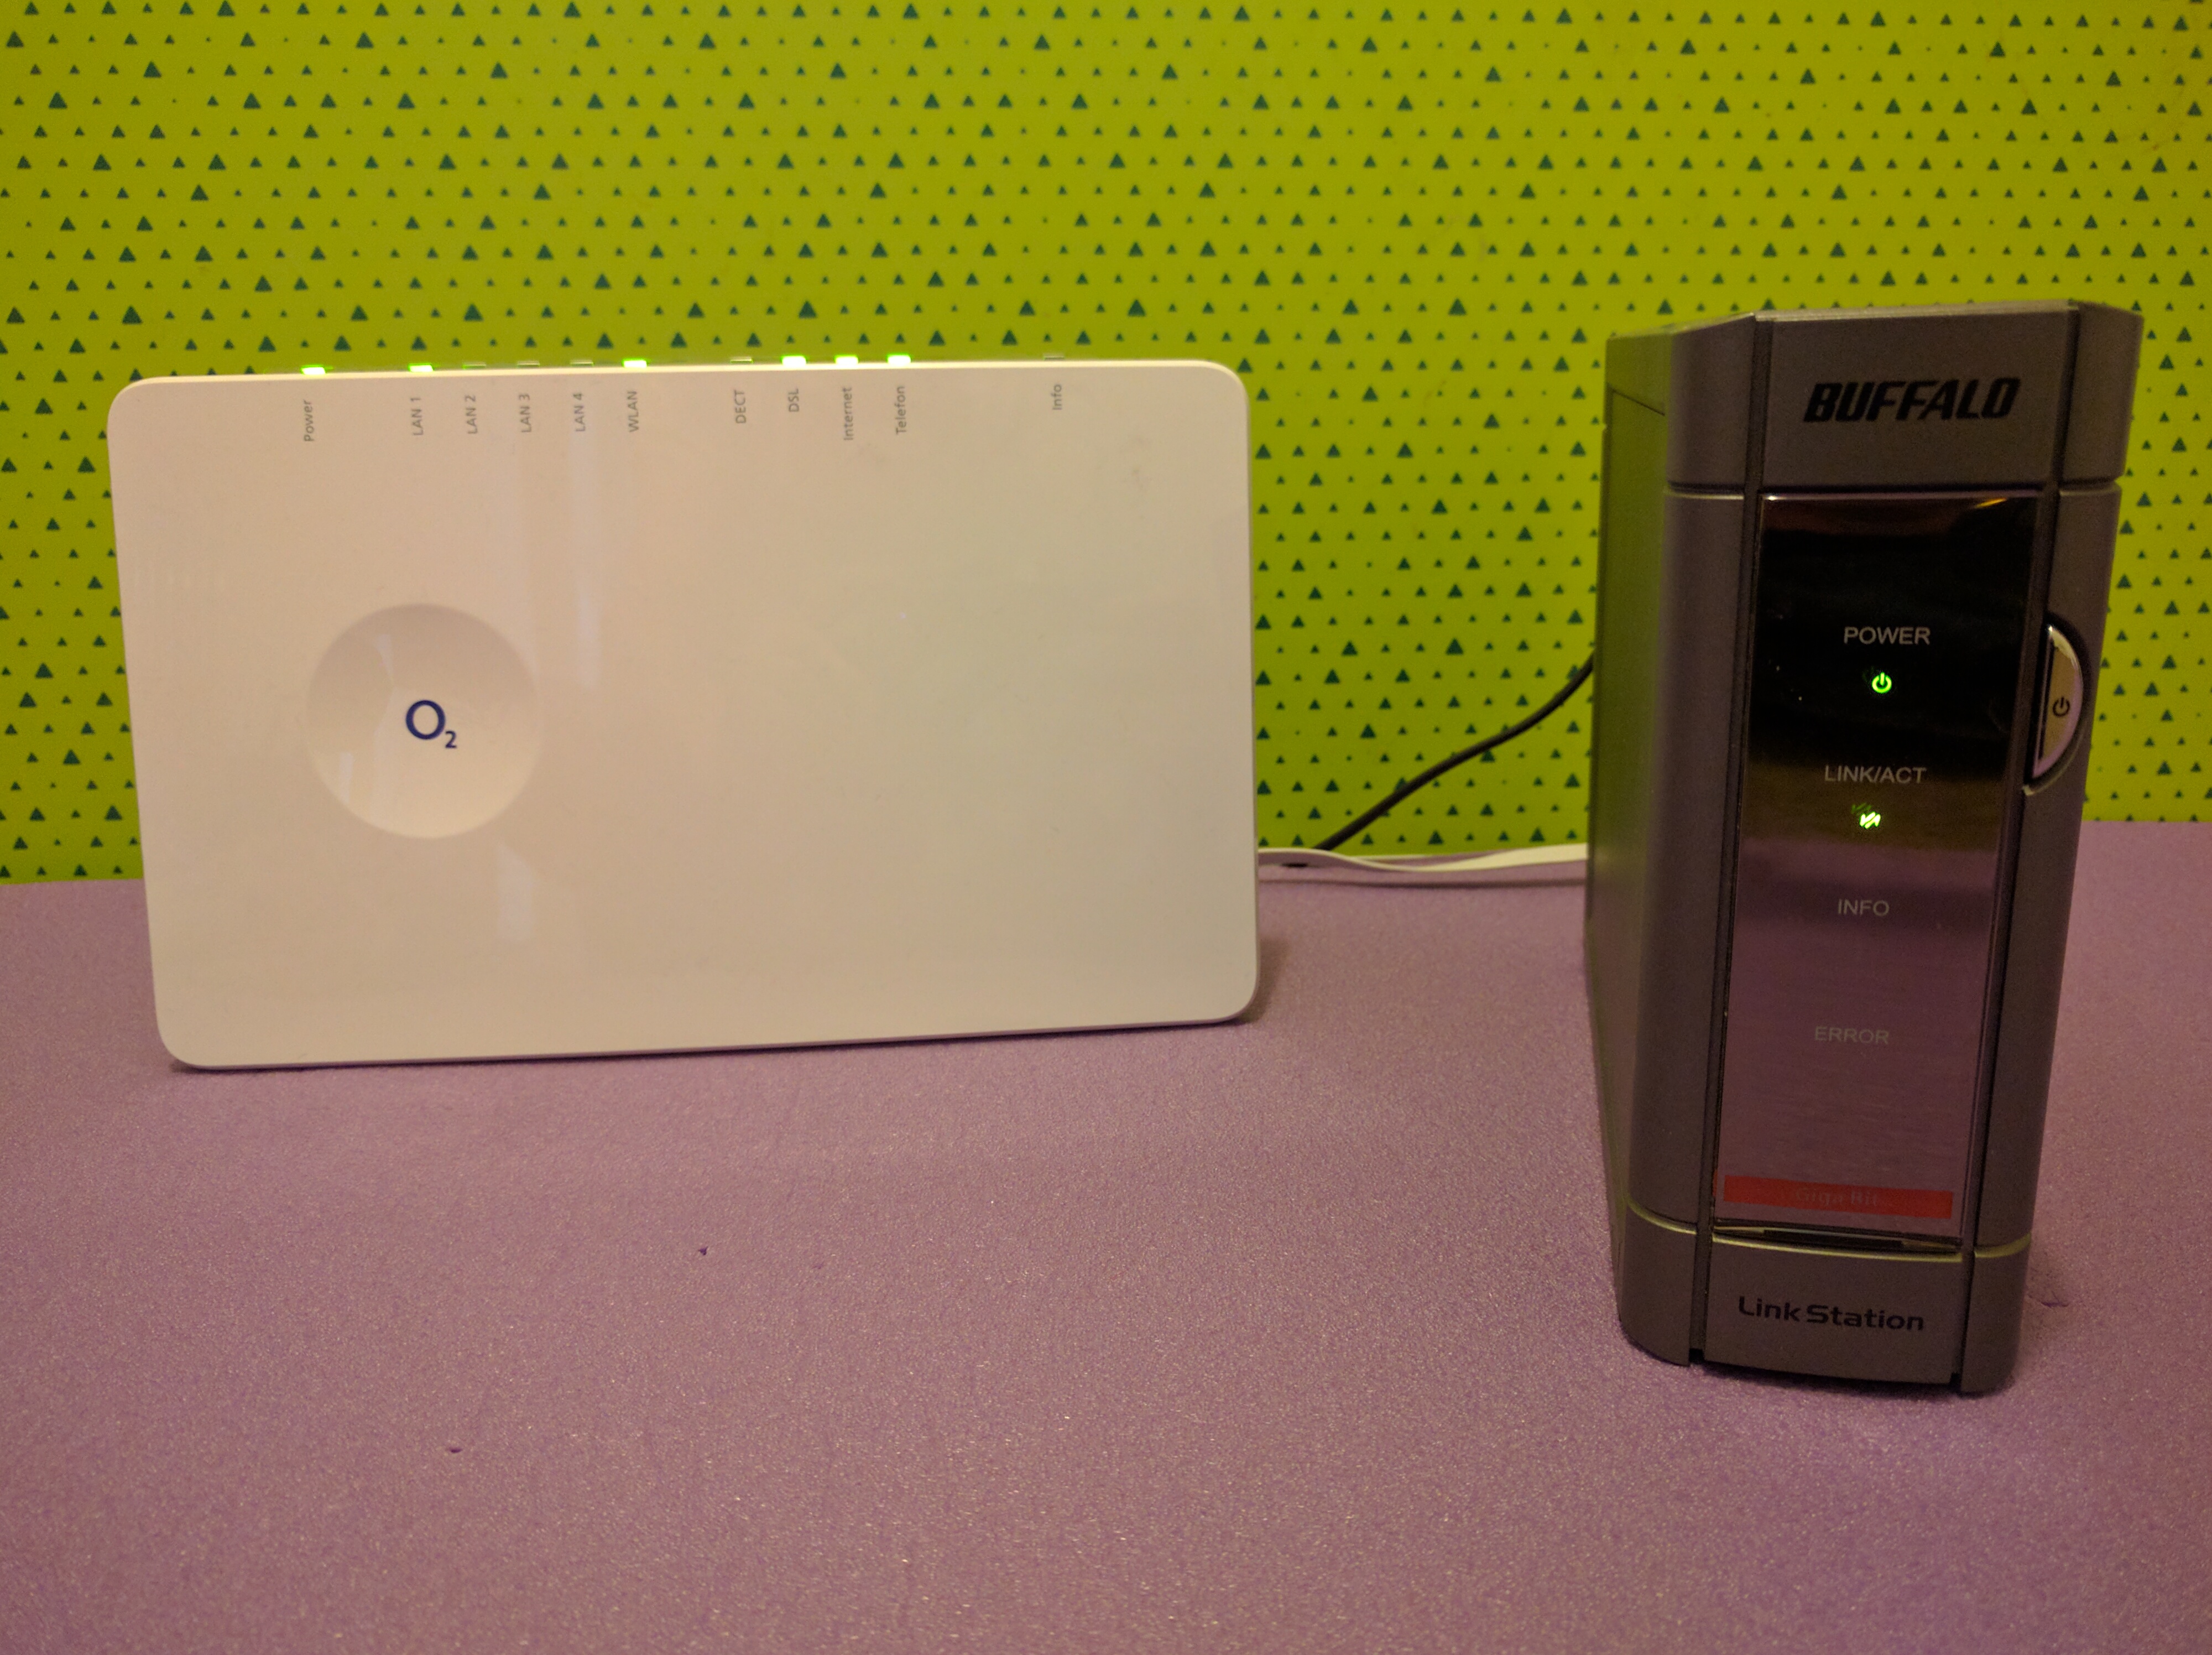
A Network Attached Storage (NAS) is connected to a wireless router via network cable.
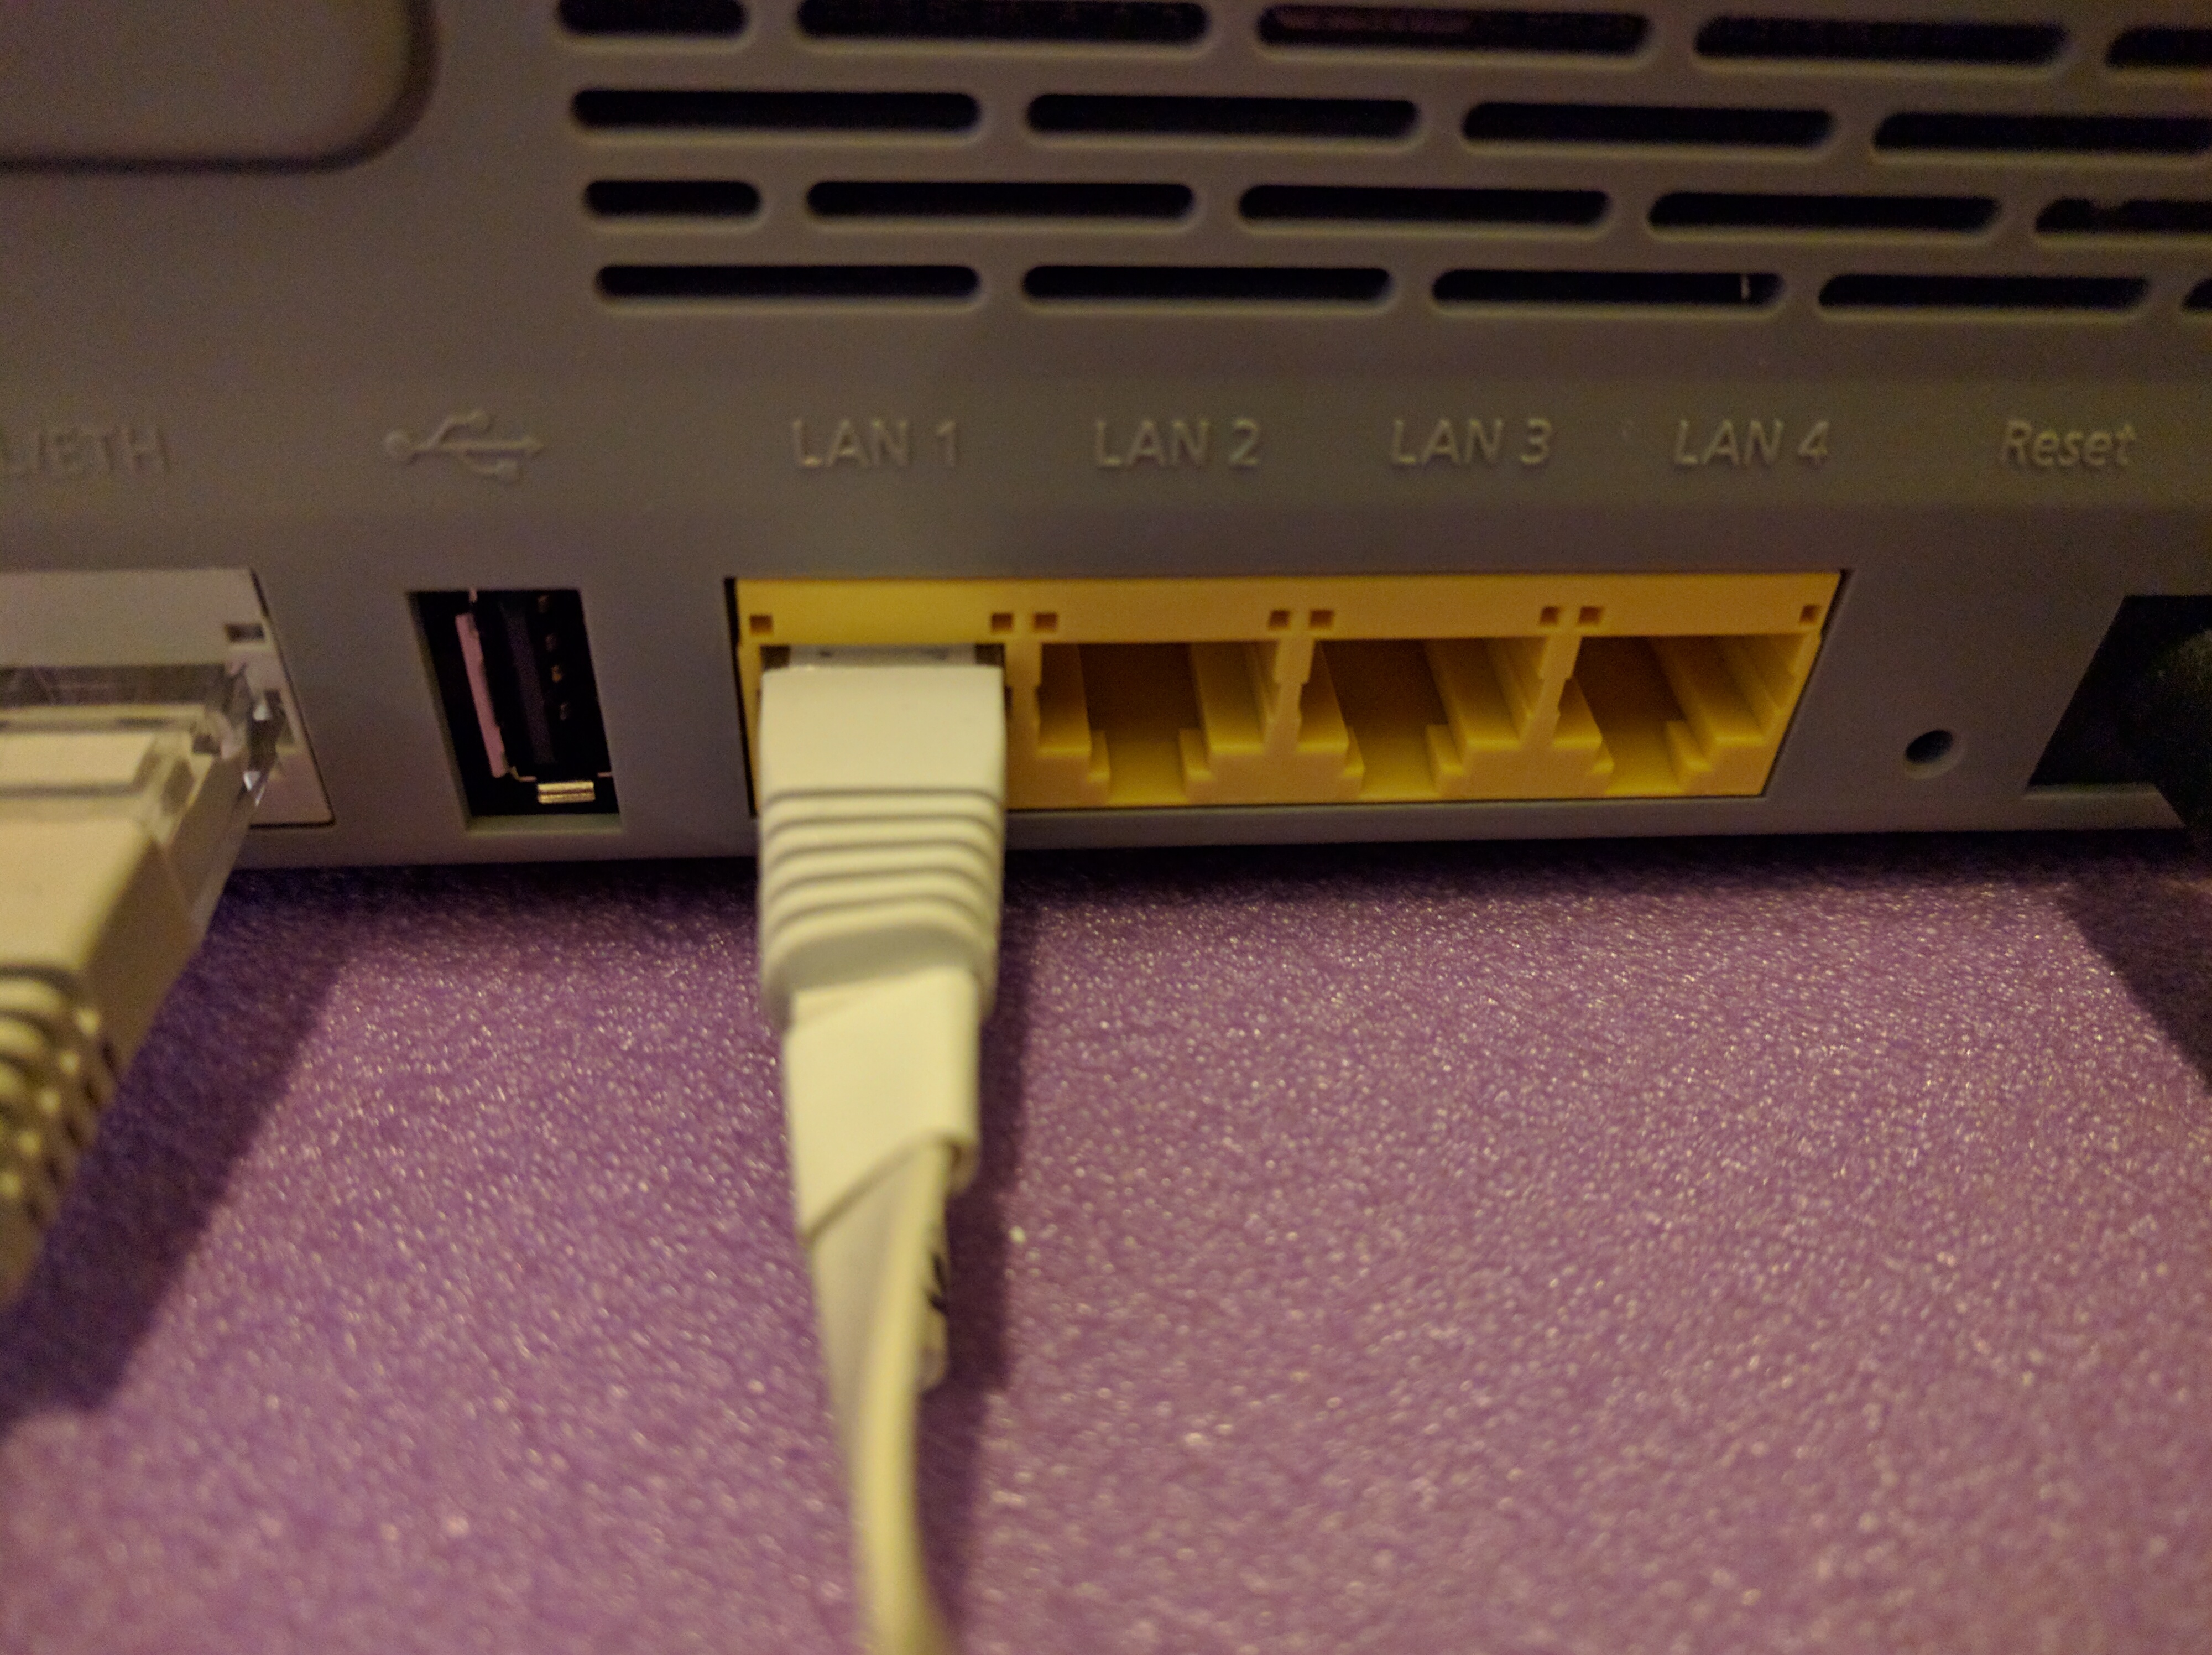
The network cable of the NAS is connected to one of the LAN ports of the router. You could also connect a USB hard disk or memory stick to the USB port.
We still need to configure the NAS, an old BUFFALO Link Station in our example. Just take a look into the manual of your NAS.
We give our NAS the name LIVESTATION and add a shared folder called Media. We make the folder accessable via Windows (SMB/CIFS) and FTP by checking the corresponding boxes. We also add a user and grant him read/write access.
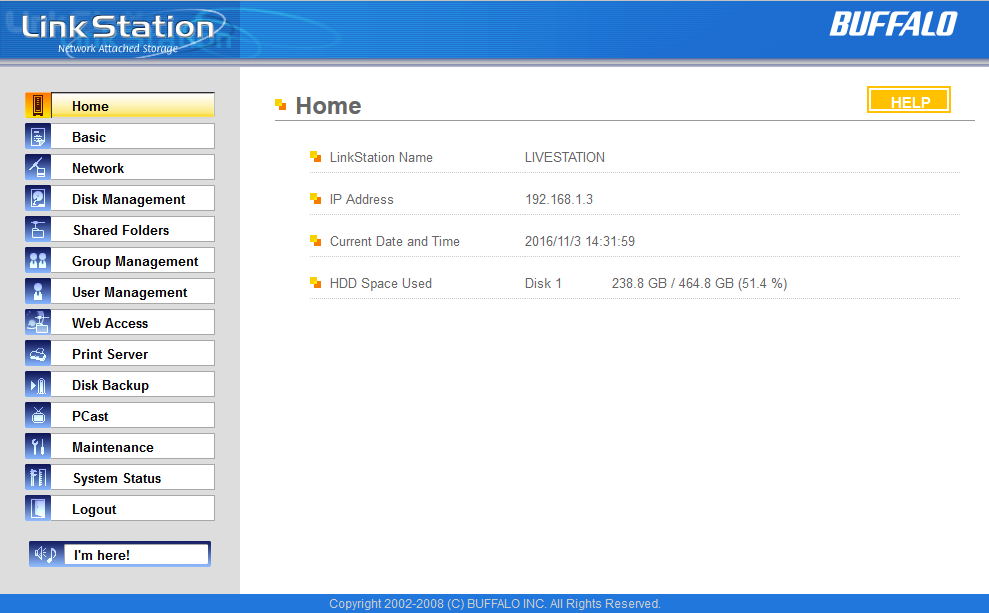
We give our NAS the name LIVESTATION.
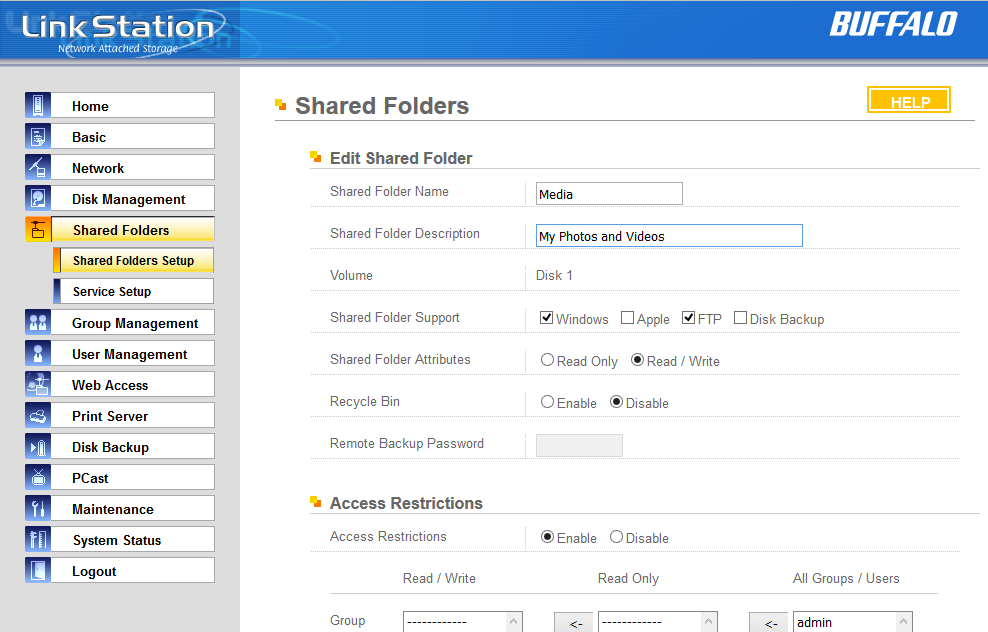
We give our shared folder the name Media and check the boxes for Windows (SMB/CIFS) and FTP access.
Our last step is to configure PhotoMap on our Android device (see the screenshots below). The fastest way to access your storage in a local network is usually FTP because it transfers files unencrypted. You can check the option FTPS for a SSL/TLS based encryption, but your storage has to be able to support that. Another option is to use the SMB/CIFS protocol. This is usually a bit slower. Just try it out.
The first time PhotoMap might need a few minutes to scan your storage, but after that you can quickly browse through all your photos and videos… Enjoy!

Add your storage to the PhotoMap settings by adding a “Network Drive” or a “FTP Server”.
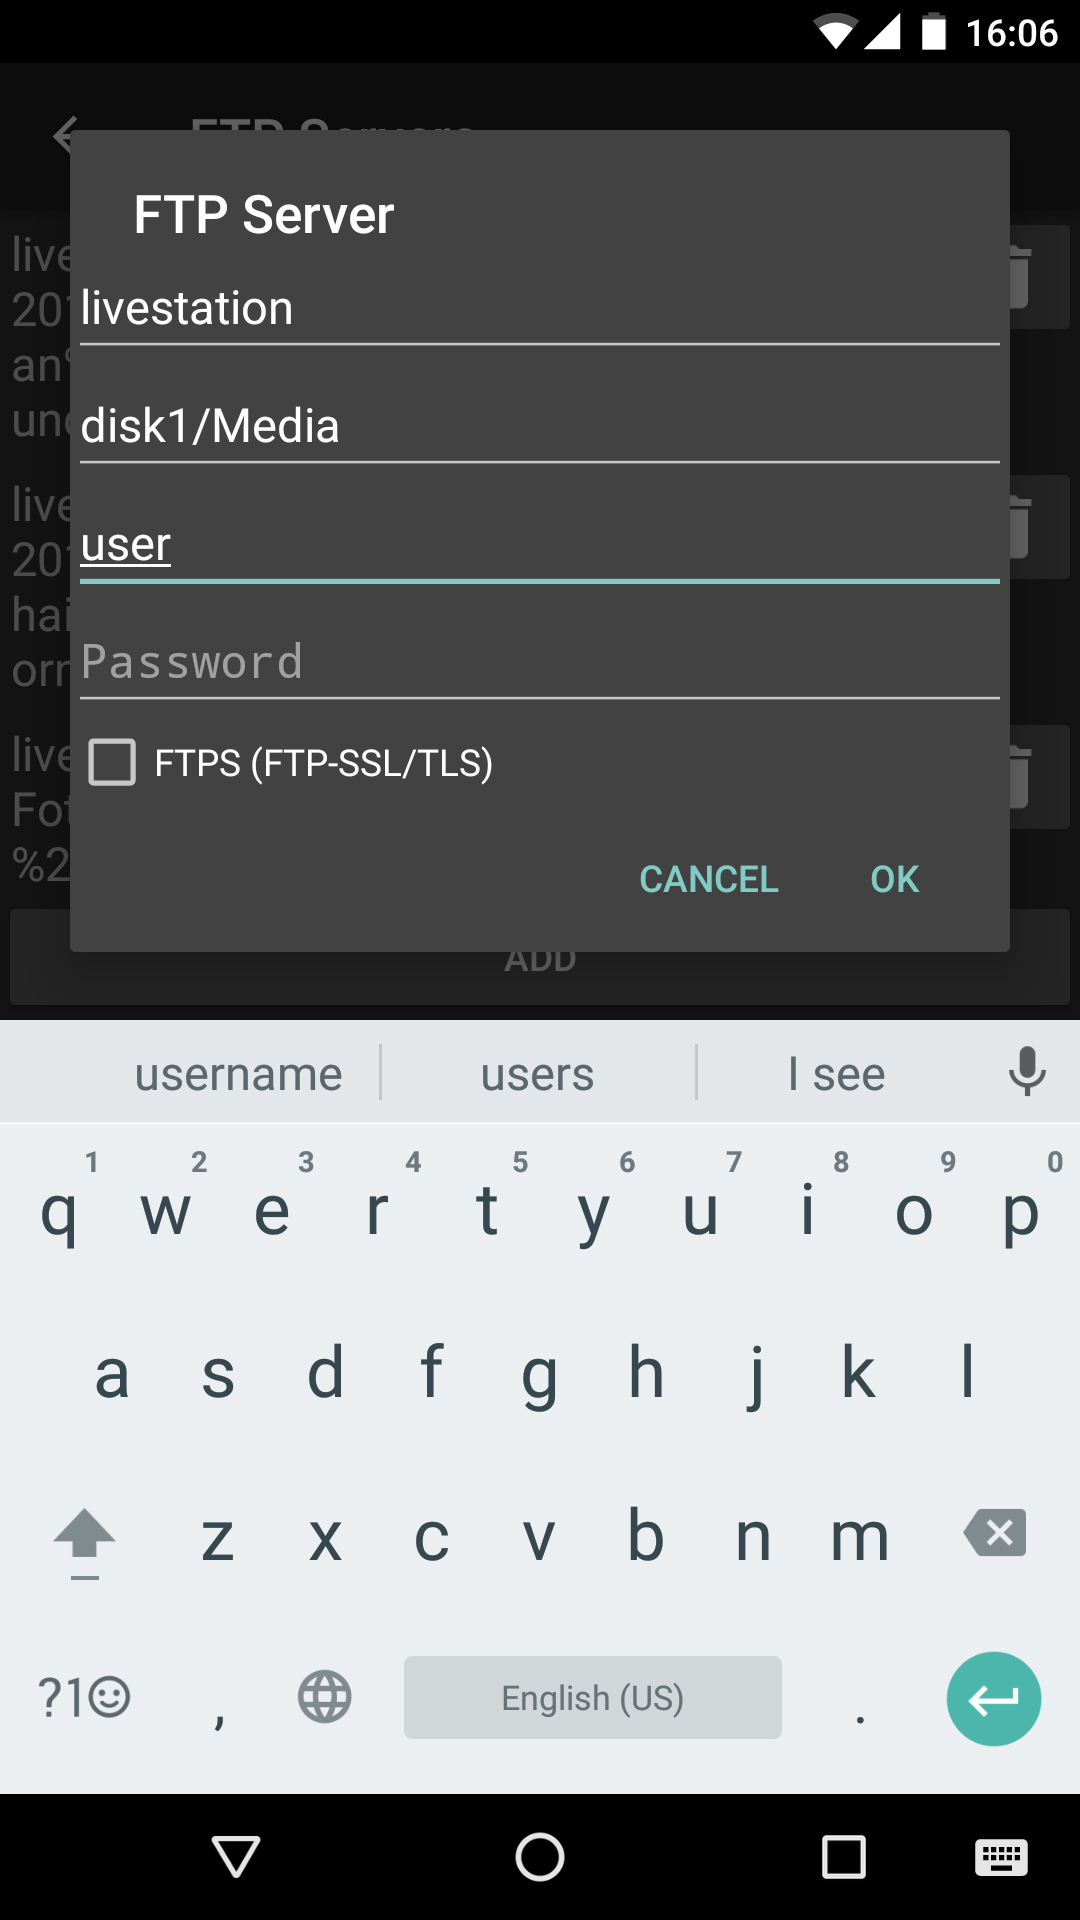
Configure PhotoMap to access your storage via FTP. On our BUFFALO Link Station, we have to add the folder disk1. Please make sure you’re using the right path by checking the manual of your NAS.
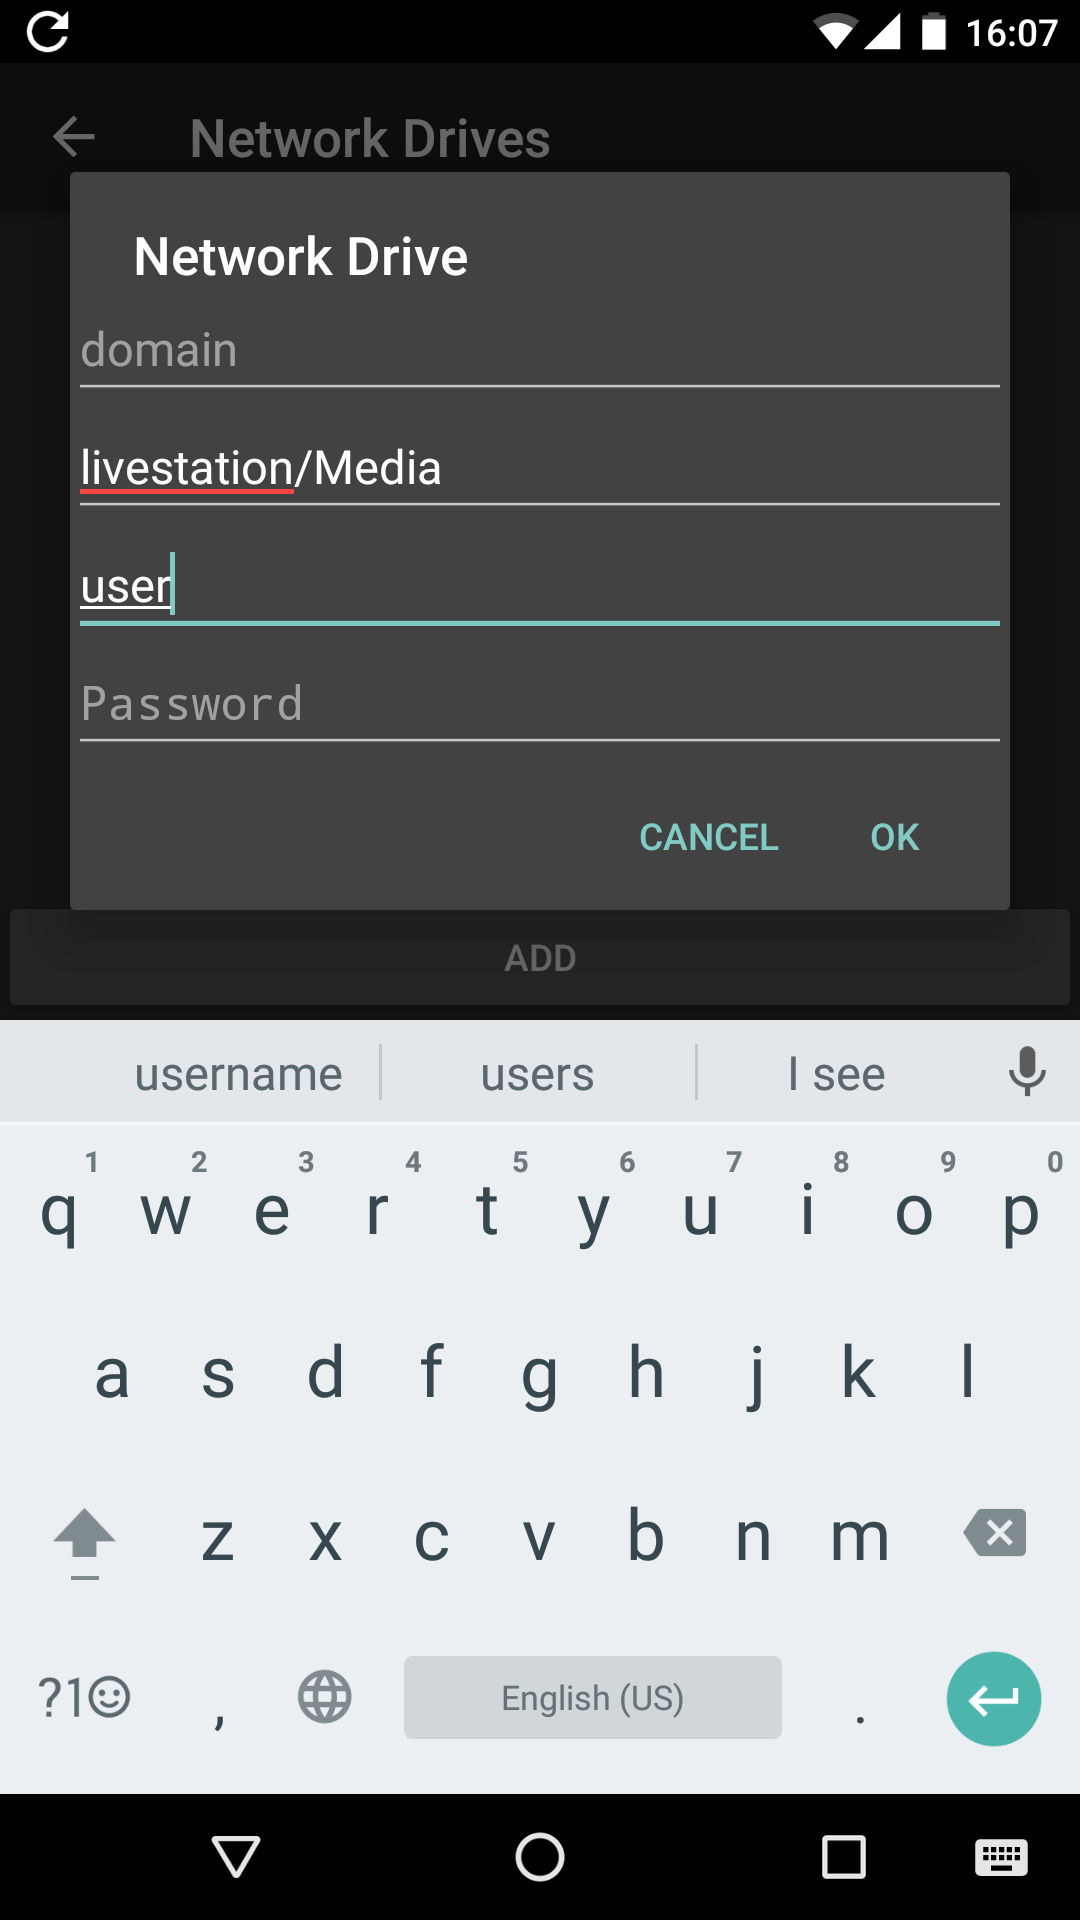
Configure PhotoMap to access your storage via SMB/CIFS.
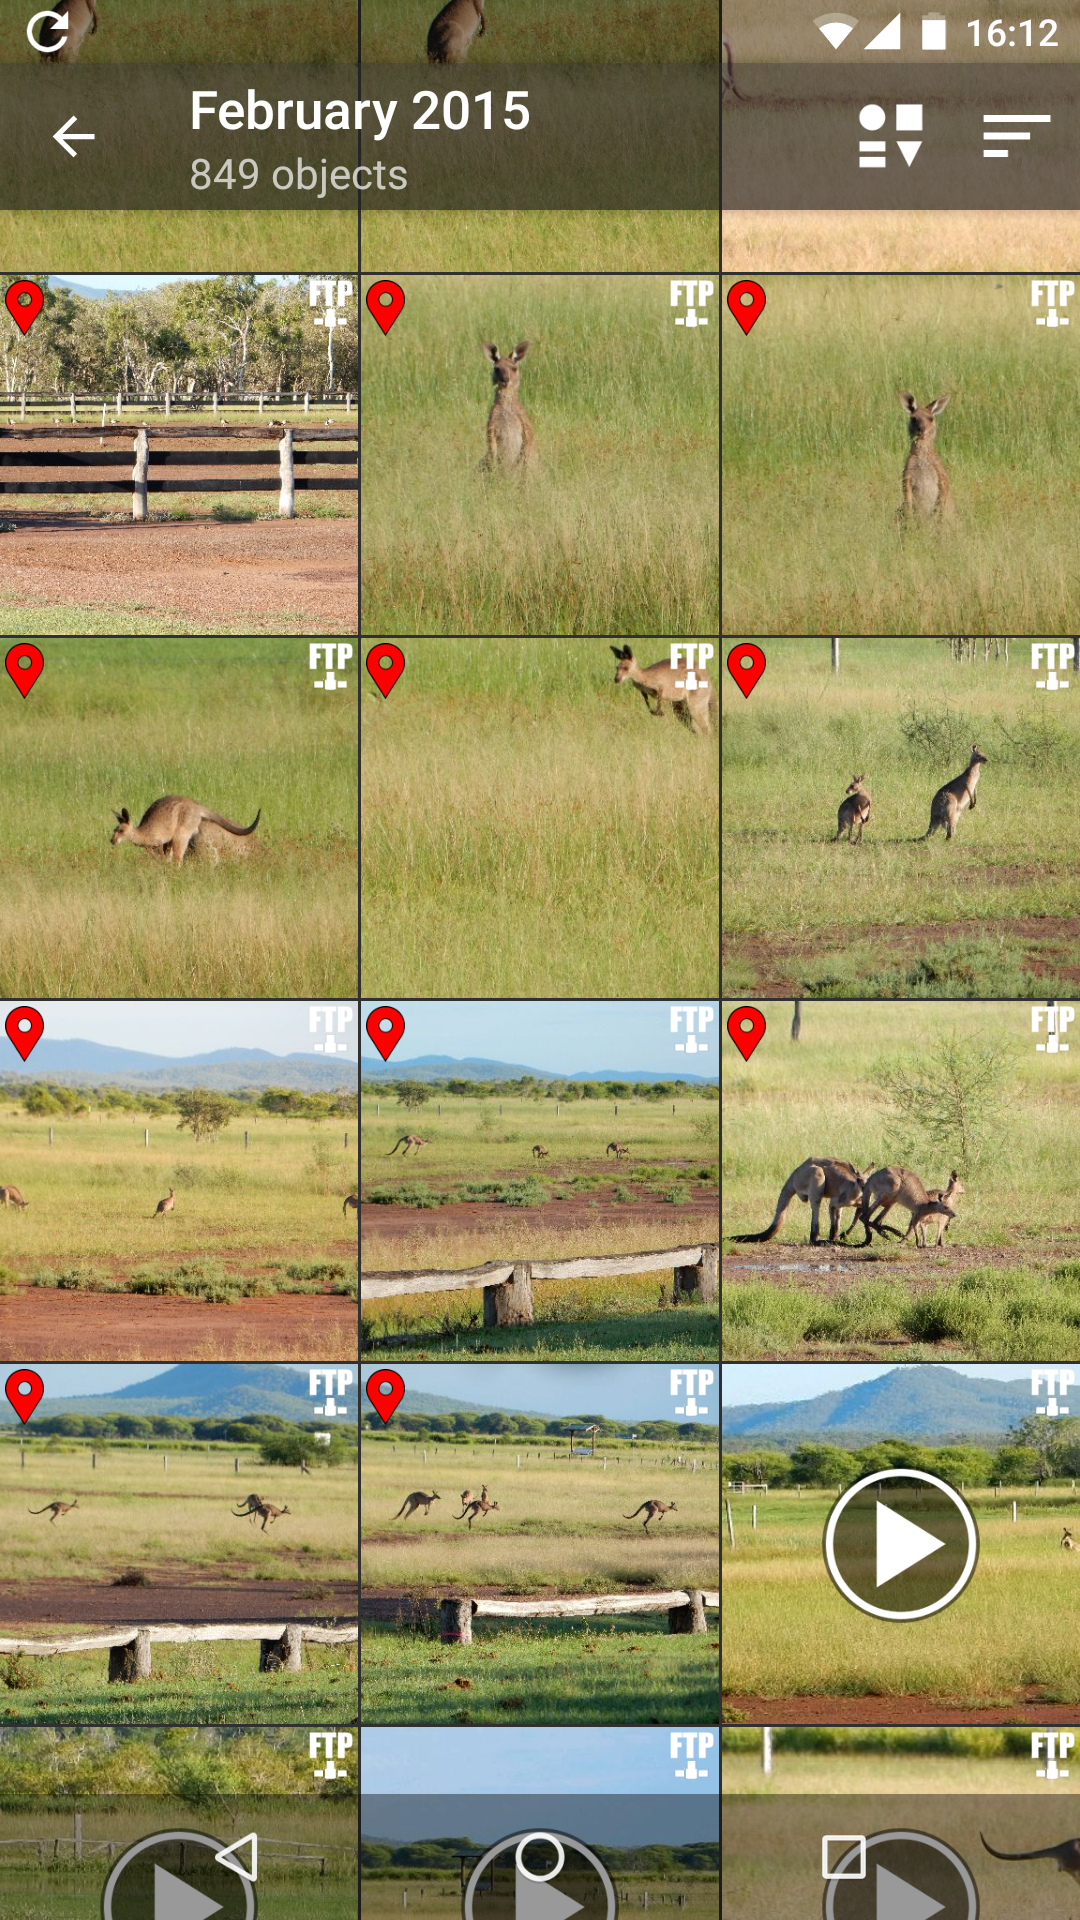
Enjoy your photos and videos by using the app PhotoMap on your Android device. The small icon in the upper right corner shows you how your photo/video is accessed.
2 Responses
[…] now be displayed as notifications in the status bar of your Android device. Please also have a look here and […]
[…] blog entry Simple Ways to your own Home Media Server explains how to set up PhotoMap to access your network […]